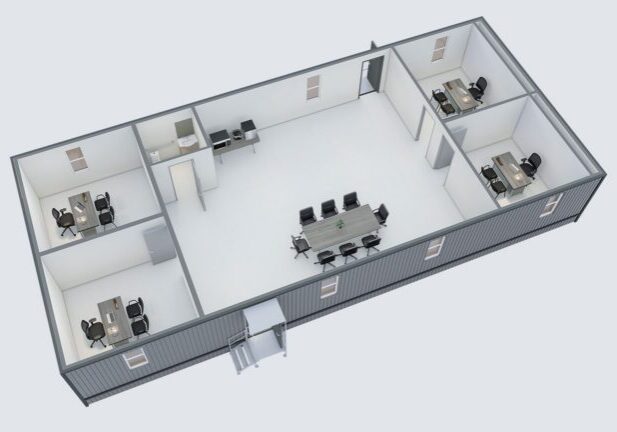
Office Trailer Site Prep Checklist: Utilities, Access, and Grade
Getting an office trailer on-site is faster than most people expect — but only if the site is ready. Most delivery delays come down to four issues: uneven ground, tight truck clearance, utilities that aren't close enough or aren't marked, and permits that weren't pulled in time. This checklist covers all four, in order.
Ask AI about Nadler

Get a Quote from Nadler
Building modular for government, education, healthcare, and commercial clients since 1977. Share your project and we'll scope it.
Request a QuoteGetting an office trailer on-site is not as hard as you might expect — as long as the site is ready. The most common delivery delays and post-installation headaches come down to the same four issues: uneven ground, not enough truck clearance, utilities that aren’t close enough or aren’t marked, and permits that weren’t pulled in time. To help you be prepared, we’ve created an essential checklist that covers all four in the order you need to address them.
Download the printable version of this checklist
Before anything else: the site visit
Before a delivery is scheduled, someone needs to assess the placement location. This could be either a Nadler representative or the client (you). It doesn’t need to be a formal inspection, but you should be able to answer the following before you call:
- Where exactly will the unit sit? (Have a specific spot in mind, not just a general area.)
- Is there a clear path from the road to that location for a delivery truck?
- Is the ground level enough, or does it need grading first?
- Where are the nearest electrical, water, and sewer connections?
- Are there any underground utility lines in the placement area? If so, have they been marked?
If you’re not sure about one or more of these, Nadler can coordinate a site visit before finalizing the order by having a sales rep or installation team survey the site in case you have any access or slope concerns. For above-grade foundations, if the unit is going to be based on dirt, the soil bearing capacity would have to be 2,500 psf at 42 inches below grade. We also recommend laying compressed stone to avoid settling over time.
1. Ground conditions and grade
What “level” actually means for a trailer site
An office trailer needs to sit on level ground. In this context, “level” means that, across the whole building area, the ground can vary up to about 6 inches above or below a target elevation. That’s easy to achieve on many natural sites without grading work, but slopes, uneven fill, or recently disturbed ground may need attention first.
If the site isn’t level, the delivery team will use blocking: stacked wood piers or steel stands placed under the chassis frame to bring the trailer to level. This is standard practice and included in most installations. What blocking can’t fix is a significant slope or soft ground that won’t hold the unit’s weight over time. Nadler’s team can also do a high set if necessary; ask your Space Agent for a quote.
Surface types that work (and ones that don’t)
The trailer and its delivery truck together can weigh 30,000+ pounds, so the ground needs to be able to handle that load without shifting. These are the recommended surfaces:
- Asphalt or concrete pads: ideal
- Compacted gravel or crushed stone: good — most common on active construction sites
- Compacted dirt or packed soil: acceptable if firm and dry
The ones to avoid:
- Loose or recently backfilled soil — will shift under load
- Grass over soft ground — delivery truck can sink; unit can settle unevenly over time
- Low-lying or waterlogged areas — see drainage below
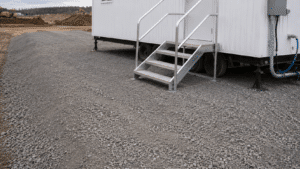
If the site only has soft ground, a gravel pad can generally be installed in 1–2 days before delivery. Make sure to budget for this in your project plan if the site is undeveloped.
Drainage: the detail most people neglect
A trailer placed in a low spot accumulates water around the entrance, turns the area into a mud hazard, and creates moisture issues under the unit over time. The number one complaint from field teams after installation is a muddy entrance area, which could have been avoided if it had been graded to drain.
The fix is simple: make sure the site drains away from the trailer entrance, not toward it. If the natural grade doesn’t do this, a light grading pass before delivery is worth the cost. If you’re on a construction site where the final grading is still months away, we advise planning for temporary drainage and expect you may need to relocate the trailer once paving or landscaping work begins in that area.
2. Delivery access
Truck clearance requirements
Mobile office trailers are delivered by a “toter”: a heavy-duty truck built for the sole purpose of towing and positioning modular units. To get the truck in, position the unit, and get the truck back out, you need:
| Requirement | Specification |
|---|---|
| Straight-ahead clearance | Usually 100 ft minimum for a 40-ft trailer + truck. Ensure sufficient clearance on either side of the trailer. |
| Width clearance | 12 ft minimum along the approach path |
| Overhead clearance | 14–16 ft minimum (wires, tree branches, structures) |
| Turning radius | If the truck needs to turn, allow additional space (discuss with your Space Agent before delivery) |
| Ground strength on approach | The approach path must handle the delivery truck’s weight, not just the trailer placement zone |
It is important to note that, if your space is too small for a truck, Nadler can always accommodate delivery using a translift or crane.
Overhead obstructions
Take a walk on the delivery path before scheduling. Check for power lines, tree branches, and structural overhangs — the most common issues — and mark anything below 16 feet. If there are active power lines near the placement area, coordinate with your utility provider before delivery. This is critical, as the driver will not proceed if the path is unclear.
If you have underground utility lines in or near the delivery path or placement area, they must be marked before delivery. Call 811 (the national Call Before You Dig service) at least 3 business days before any ground-disturbing work.
Planning for parking and daily access
Once the trailer is in place, you, your team, and any visitors need to get to it safely every day. Before the unit arrives, map out:
- Employee and visitor parking (does it exist, or does it need to be created?)
- Pedestrian path from parking to trailer entrance — should avoid active work zones
- ADA-accessible route if required — ground-level or ramped entry (At Nadler, we can include ramps; see NadlerPlus)
- Space for future truck deliveries or pickups near the trailer
3. Utility connections
Utility connections are finalized after the trailer is placed, but the proximity planning has to be ready before delivery. As every additional foot of utility run adds cost, the goal is to position the trailer close enough to the source that connections are straightforward.
Electrical
An electrical connection is required for every occupied office trailer rental, lease, or purchase. The unit comes with a breaker panel sized for the trailer, which is connected to your site’s power source by a licensed electrician. This is what you need in place before delivery:
- A temporary power pole or access point within a reasonable distance of the placement area
- Confirmation that your electrical source provides the right service (most trailers require 100–200 amp, 120A/240V single-phase; we encourage you to confirm with your Nadler rep before ordering)
- GFCI protection on any outdoor circuits — required under OSHA 29 CFR 1926.405
- Grounding at the trailer — required under the same standard
If grid power isn’t available at the site yet, a generator is the fallback. Our NadlerPlus solution can include generator access as part of your order, all on the same invoice.
Water and sewer
This is only required if the trailer has a restroom or sink. If it does, you’ll need:
- A water supply connection within reach of the unit (municipal water or a water barrel supply)
- A sewer connection or an approved alternative — office trailer restrooms aren’t self-contained and can’t simply drain to the ground
- If municipal water and sewer aren’t accessible, a holding tank for waste and a freshwater barrel are the standard alternative. NadlerPlus covers both.
Water and sewer connections generally take 3–5 days once a licensed plumber is on-site, pending local permit requirements. Still, duration largely depends on the distance and the team. A contained system installation should only take one day.
Data and phone
Most sites run a standard internet connection to the trailer, either a wired run from an existing connection or a commercial Wi-Fi setup. NadlerPlus includes Wi-Fi connectivity as an add-on, which avoids the coordination overhead of running a separate data line. If you’re using multiple trailers as a complex, a shared Wi-Fi backbone that handles all units on a single system is much more efficient than managing individual hotspots per unit.
What to do when utility infrastructure isn’t available
On undeveloped or early-stage sites where infrastructure isn’t ready, here’s the practical checklist:
- Electricity: generator (available through NadlerPlus)
- Water: fresh water barrel (available through NadlerPlus)
- Waste: holding tank + service schedule, or a nearby portable restroom unit
- Internet: commercial Wi-Fi/LTE solution (available through NadlerPlus)
All of these can be wrapped into a single Nadler order and billed on one invoice. Because when we say we are “assembled around you”, we mean it.
4. Permits and code requirements
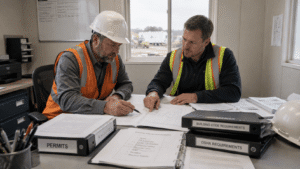
Whether your mobile office trailer needs a permit depends on your municipality, the duration of installation, and sometimes the square footage of the unit. There is no single national standard, as requirements are significantly different between jurisdictions.
What is generally true across most locations:
- Short-term installations (a few weeks) may be exempt in some areas, but this isn’t universal.
- Installations longer than 6–12 months nearly always require a permit.
- Setback rules — how close the trailer can be to property lines, other structures, or combustibles — usually apply, even for “temporary” units.
- Electrical and plumbing connections always require a permit and licensed contractor inspection in most jurisdictions, regardless of the trailer’s temporary status.
The safest approach is to check with your local building department before delivery. Our team at Nadler can advise you on what’s typically required in your area, but your local authority having jurisdiction (AHJ) has the final word. We can also provide you with state-sealed building plans and foundation drawings to help you make an informed decision.
5.
If your office trailer is on a construction site, OSHA Part 1926 applies. These are the key requirements for an occupied trailer:
| Requirement | OSHA Reference |
|---|---|
| Handrails on stairs with 4 or more risers | 29 CFR 1926.1052 |
| Fire extinguisher inside the trailer and within 75 ft outside | 29 CFR 1926.150 |
| EXIT signage at all exits | 29 CFR 1926.34 |
| GFCI protection on electrical circuits; proper grounding | 29 CFR 1926.405 |
| First aid kit on-site | 29 CFR 1926.50 |
| OSHA “Job Safety and Health” poster displayed | OSHA 3165 |
Violations for serious OSHA infractions carry penalties up to $16,550 per occurrence (as of 2025 — amounts are adjusted annually).
Nadler’s trailers come with OSHA-compliant stairs included. If ADA-accessible ramp access is needed instead of or in addition to stairs, our NadlerPlus solution includes compliant ramp configurations.
Site Prep Checklist (Printable)
Ground and Grade
- Site is level within 1″ change per 10–12 ft
- Surface is firm: asphalt, concrete, compacted gravel, or packed soil
- Drainage flows away from the trailer entrance
- No loose, backfilled, or waterlogged areas in the placement zone
- Gravel pad or grading work scheduled if needed
Delivery Access
- Sufficient clearance on either side of the trailer. If not sure, assess with the provider.
- 12 ft minimum width clearance along the approach path
- 14–16 ft overhead clearance (wires, branches, structures)
- The delivery approach ground is firm enough for the truck’s weight
- Underground utilities in the delivery path are marked (Call 811 at least 3 business days in advance)
- Parking and pedestrian access plan in place for day-to-day use
Utilities
- Temporary power pole or power source within reach of the trailer
- Electrical service type confirmed (100–200 amp, 120A/240V Single Phase)
- GFCI protection and grounding plan confirmed with the electrician
- Water supply confirmed (municipal hookup or water barrel)
- Sewer/waste confirmed (municipal hookup, holding tank, or portable restroom)
- Internet/data plan confirmed (wired run, Wi-Fi, or LTE via NadlerPlus)
- If no site utilities: generator, water barrel, holding tank ordered via NadlerPlus
Permits and Compliance
- Local building department consulted on permit requirements
- Permit application submitted (if required) — allow enough time for approval by your local jurisdiction
- Electrical and plumbing permits pulled (separate from building permit)
- Property setback requirements reviewed
- OSHA requirements reviewed (stairs/ramps, fire extinguisher, EXIT signs, GFCI, first aid)
What Nadler handles vs. what you handle
| Nadler handles | Customer handles |
|---|---|
| Delivery and positioning of the trailer | Site grading and surface prep before delivery |
| Blocking to level the unit on delivery day | Pulling building permits (we can advise) |
| OSHA-compliant stairs (standard) | Arranging a licensed electrician for power hookup |
| ADA-compliant ramps (via NadlerPlus) | Arranging a licensed plumber for water/sewer hookup |
| Sanitation systems (via NadlerPlus) | Marking underground utilities before delivery (Call 811) |
| Furniture and on-site security (via NadlerPlus) | Parking and pedestrian access planning |
| Single point of contact throughout the process | Local code compliance verification with AHJ |
Ready to start your site prep? Your Dedicated Single Point of Contact can review the site checklist with you before scheduling delivery.